How do you repair a damaged flexible PCB board?
repair a damaged flexible PCB board
Repairing a damaged flexible PCB (Printed Circuit Board) can be a meticulous and delicate process due to the unique properties of flexible materials. Unlike rigid PCBs, flexible PCBs require special techniques to ensure the integrity and functionality of the board are restored without causing further damage. Here’s a comprehensive guide on how to repair a damaged flexible PCB board.
Before beginning any repair, a thorough assessment of the damage is crucial. Inspect the PCB for visible signs of damage such as cracks, broken traces, delamination, or burned areas. Use a magnifying glass or microscope to identify microscopic damage that might not be visible to the naked eye. Ensure the work area is clean and free of static electricity, as flexible pcb board are sensitive to static discharge. Use a continuity tester to locate the exact point where the trace is broken. Clean the damaged area with alcohol and a lint-free wipe to remove any debris or oxidation.
Carefully scrape off the insulating layer on both ends of the broken trace to expose the copper. Be gentle to avoid further damage to the flexible substrate. Apply a small amount of flux to the exposed copper areas to facilitate soldering. There are two main methods to bridge the broken trace: Use a fine-tip soldering iron to apply a small amount of solder to the exposed copper areas, then solder a fine wire or a piece of copper tape to bridge the gap. Alternatively, you can use conductive epoxy or silver conductive ink to connect the broken ends. Apply a thin layer over the broken trace and allow it to cure as per the manufacturer’s instructions.
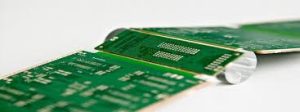
How do you repair a damaged flexible PCB board?
Carefully desolder the damaged component using a soldering iron or desoldering station. Use tweezers to gently lift the component off the board. Clean the pads with alcohol and a lint-free wipe, then apply a small amount of flux to the pads. Position the new component on the pads using tweezers. Use a fine-tip soldering iron to solder the component in place. Ensure the solder joints are clean and secure.
Delamination, where the layers of the flexible PCB separate, can be more challenging to repair. If the delamination is minor, you can use heat and pressure to re-laminate the layers. Place a piece of Kapton tape over the delaminated area, apply heat with a hot air rework station, and apply gentle pressure until the layers bond together. For significant delamination, it might be more effective to replace the affected section of the PCB.
After completing the repairs, inspect the PCB under a microscope to ensure all connections are secure and there are no solder bridges or other issues. Perform a continuity test on repaired traces and components to verify electrical connections. Finally, power up the device and test its functionality to confirm that the repair was successful.
Repairing a damaged flexible PCB requires precision, patience, and the right tools. By carefully assessing the damage, using appropriate materials, and following meticulous repair procedures, it is possible to restore the functionality of a flexible PCB. Whether it involves bridging broken traces, replacing damaged components, or addressing delamination, understanding and executing these repair techniques can extend the life of flexible electronic devices and reduce waste.















































Post Comment