How can you repair a damaged circuit board?
repair a damaged circuit board
Repairing a damaged circuit board can seem daunting, but with the right tools, techniques, and a systematic approach, it can be accomplished effectively. Circuit boards, whether they are part of a small electronic device or a complex system, can suffer damage due to various reasons, including electrical surges, physical impacts, moisture exposure, and component failures. Understanding how to diagnose and repair these issues can save time and money while prolonging the life of the electronic device.
The first step in repairing a damaged circuit board is to identify the problem. This process often involves a visual inspection of the board to look for obvious signs of damage, such as burnt components, broken traces, or corrosion. Tools such as magnifying glasses or microscopes can be beneficial for examining small components and intricate connections. Additionally, using a multimeter can help verify whether components are functioning correctly and if electrical connections are intact. A thorough diagnostic assessment is crucial, as it guides the repair process and helps to avoid unnecessary work.
Once the issues have been identified, the next step is to gather the necessary tools and materials for the repair. Essential tools typically include a soldering iron, solder, desoldering pump or braid, tweezers, and a multimeter. Depending on the type of repair needed, you may also require replacement components, such as resistors, capacitors, or integrated circuits. For more extensive repairs, tools like a microscope or an oscilloscope may be useful for precise soldering and testing.
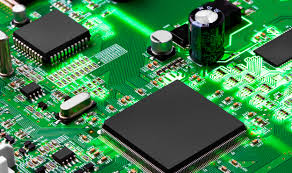
How can you repair a damaged circuit board?
One of the most common repairs involves replacing damaged components. This process begins by carefully desoldering the faulty component using a soldering iron and a desoldering pump or braid. It’s essential to be gentle during this process to avoid damaging the circuit board or surrounding components. Once the faulty component is removed, the new component can be positioned and soldered in place. Proper soldering technique is crucial to ensure strong electrical connections and avoid issues such as cold solder joints or shorts.
In cases where there are broken traces on the circuit board, a repair method called “trace repair” may be necessary. This process involves using fine wire, such as copper wire or wire wrap wire, to create a bypass around the damaged area. First, the area surrounding the break must be cleaned and prepared, and then the wire is soldered to both ends of the break, effectively restoring the electrical connection. For minor breaks, conductive ink or a conductive adhesive can also be used as a simpler alternative.
If moisture damage is present, it’s essential to clean the circuit board thoroughly. This can be done using isopropyl alcohol and a soft brush to remove any corrosion or debris. After cleaning, it’s important to ensure that the board is completely dry before attempting any repairs. In cases of severe corrosion, components may need to be replaced, and it’s essential to check for underlying damage that could affect the board’s functionality.
Once all repairs are completed, the next step is to test the circuit board to ensure everything is functioning correctly. This can involve powering the board and using a multimeter to measure voltages at various points or running specific tests to confirm that all components are operating as intended. If the board does not work as expected, further troubleshooting may be necessary to identify any overlooked issues.
In conclusion, repairing a damaged circuit board is a manageable task with the right approach and tools. By identifying the problem, gathering necessary materials, and employing effective repair techniques, many circuit board issues can be resolved. Whether replacing components, repairing traces, or cleaning corrosion, these steps can help restore functionality to the circuit board. Ultimately, understanding the repair process not only saves costs but also enhances one’s skills in electronics, paving the way for more advanced repairs and improvements in future projects.















































Post Comment